

Exploring CNC Laser Cutting with ArcDroid and the Xlaserlabs X1 Pro
Fire the lasers!!!

WARNING: I am not a laser expert. This is work-in-progress and is only being provided for informational purposes. Messing with a laser is dangerous and should only be done by professionals who know what they are doing!
For the last several years, I have used an ArcDroid in conjunction with a plasma cutter and a water table. It does great, but my use case is for much thinner metals that a plasma cutter tends to destroy. For the record, I am at best an amateur machinist and even less of a welder. Earlier this year, I procured Xlaserlabs’ X1 Pro laser cutter/welder/cleaner.
Out of the box, it worked great as all three, albeit by hand. What I really wanted is a CNC laser, however. The Xtool Metal Fab rolled out shortly after, and while I love Xtool and own many of their lasers (P2, F1 Ultra, M1 Ultra), the Metal Fab is just too big for a basement machine shop like mine.
The marketing material for the X1 Pro mentioned it was possible to use it for CNC use cases, but provided limited details. After some research and testing, here is how I got my ArcDroid and X1 Pro to play nicely together.
Here is the wiring diagram:
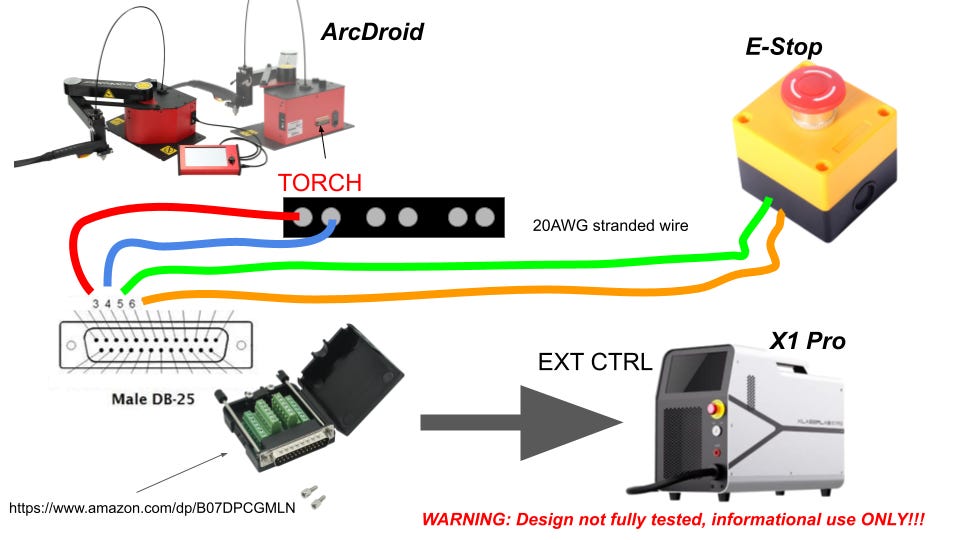
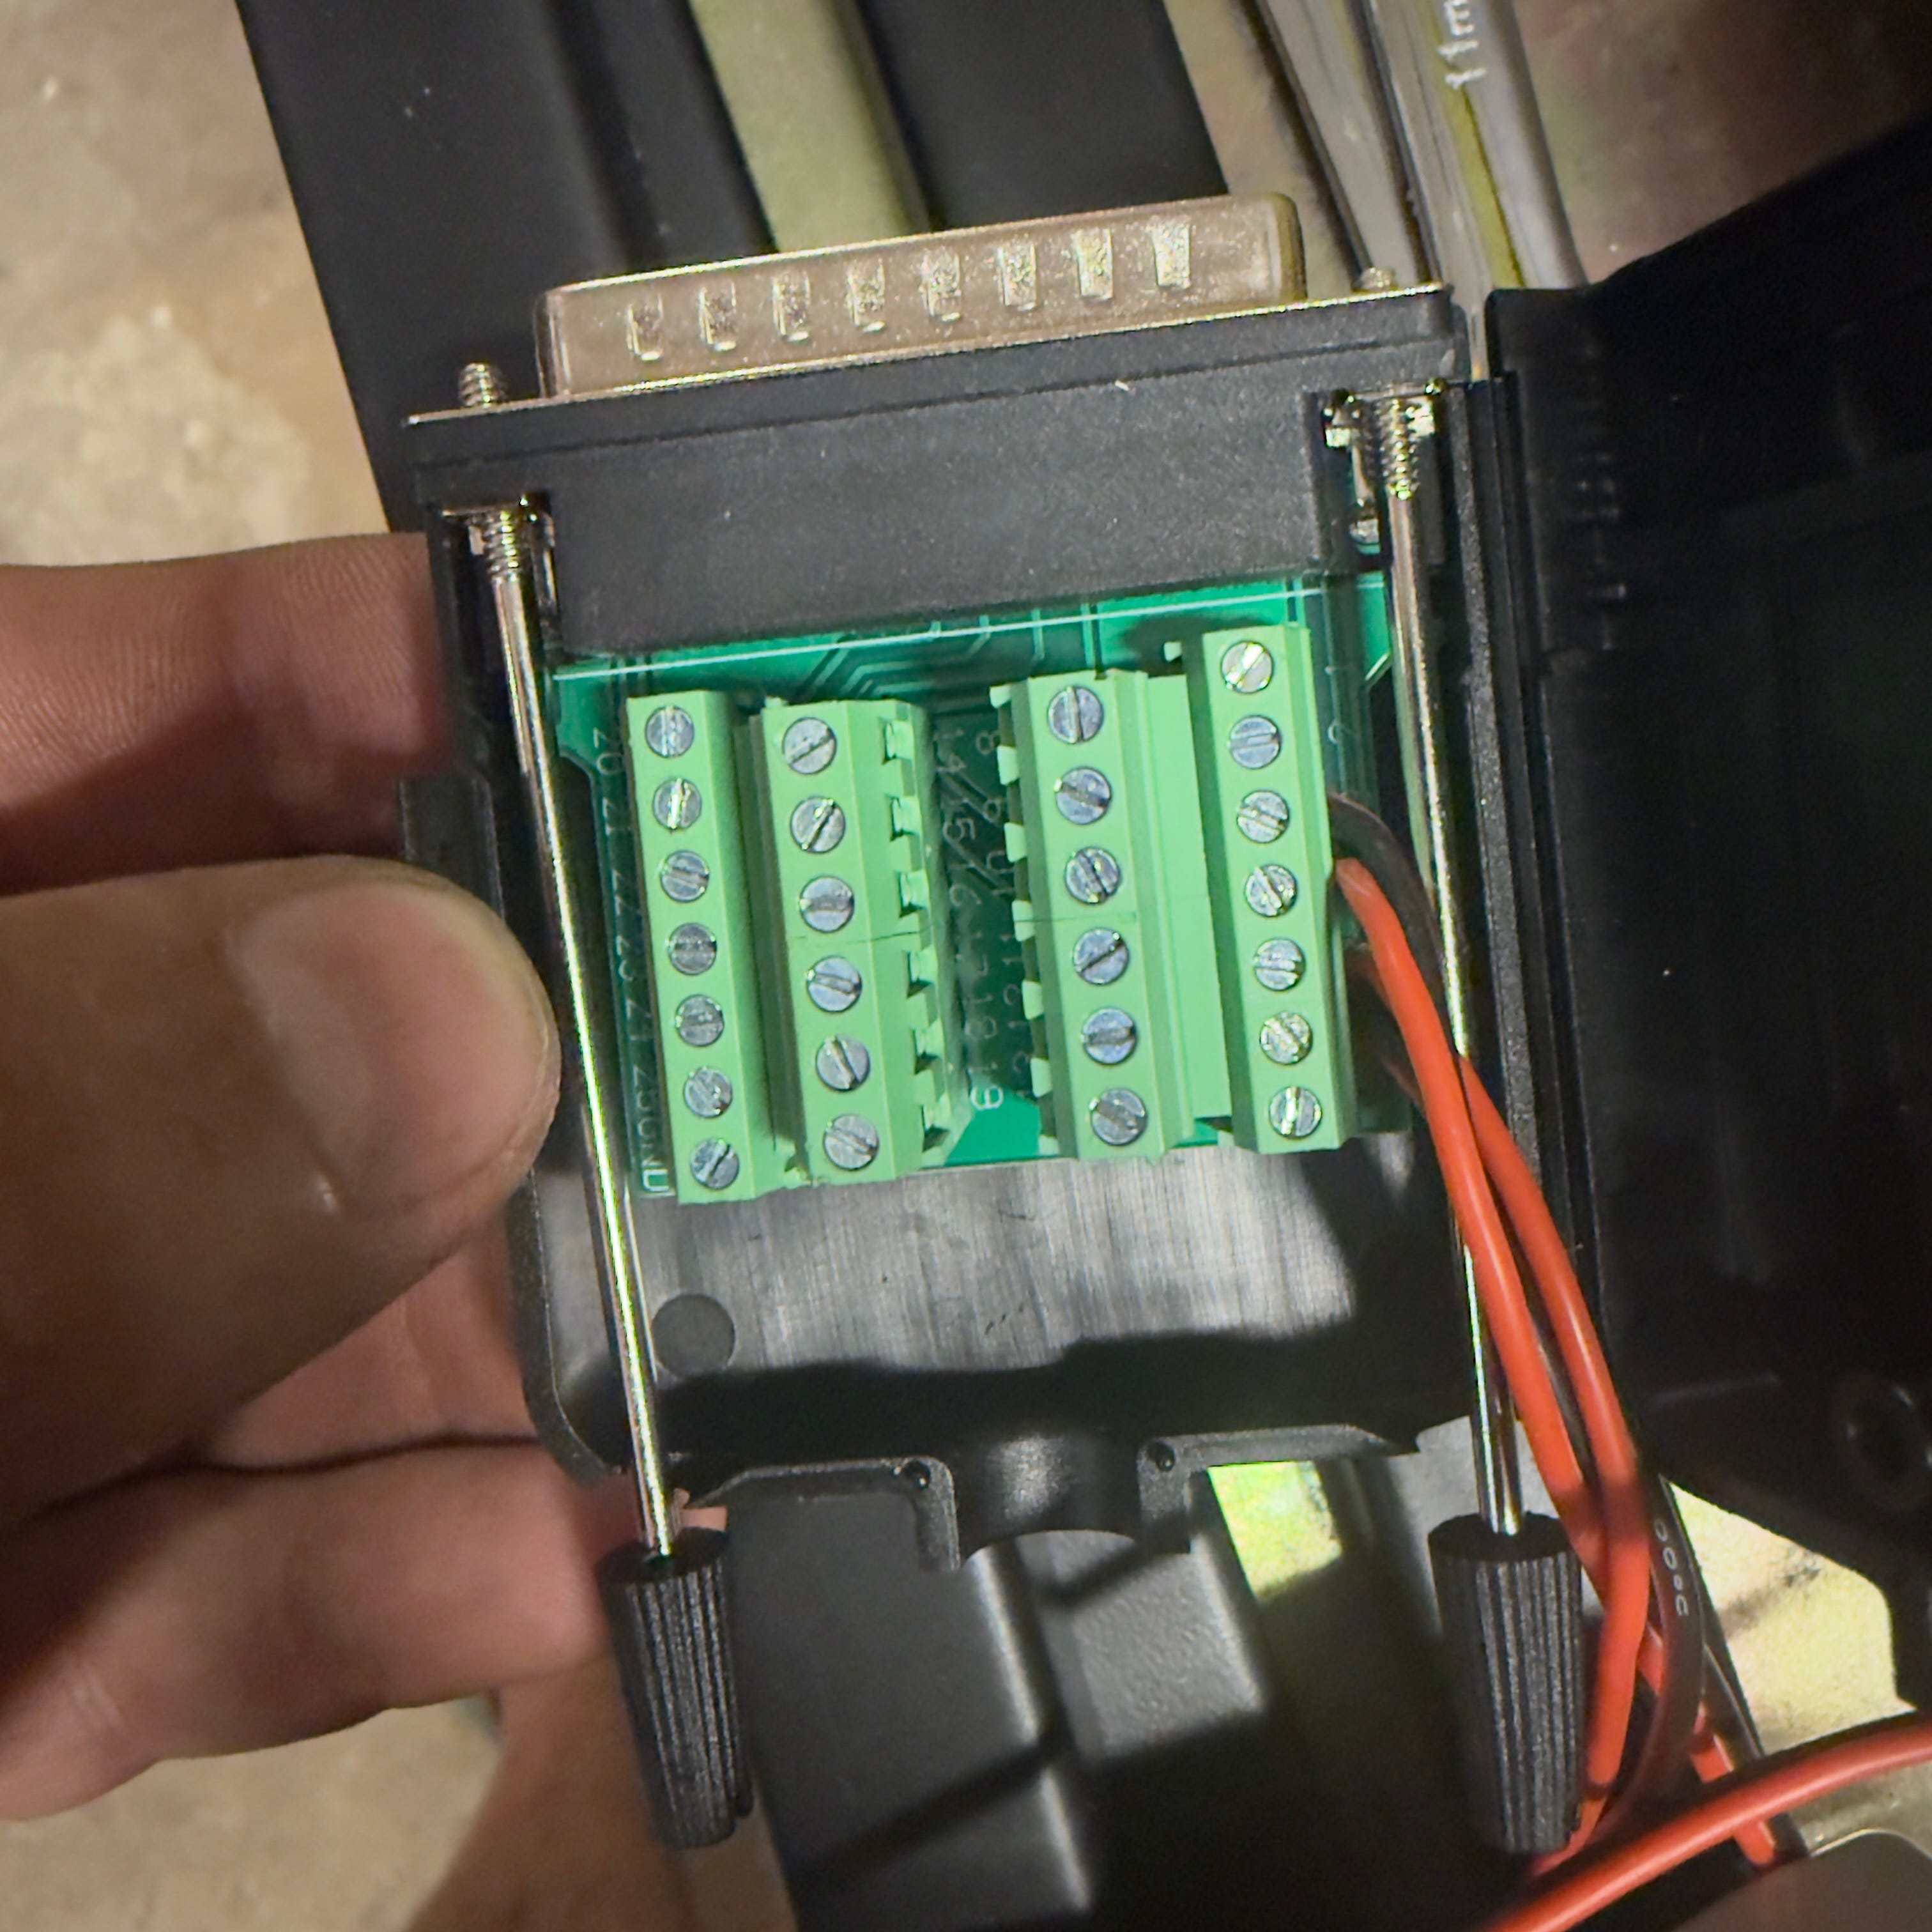
First thing we need to do is to change out the DB25 external control cable. I purchased a breakout DB25 connector from Amazon (https://www.amazon.com/dp/B07DPCGMLN). I ran two pairs of 20AWG stranded wire, one to the external emergency stop. Do NOT just short the e-stop! The second pair of wires ran to torch connectors on the rear of the ArcDroid. As far as I know, polarity doesn’t matter for either connection.
Pins 5 and 6 connect to the external e-stop.
Pins 3 and 4 connect to the ArcDroid external torch control on the rear of the ArcDroid.
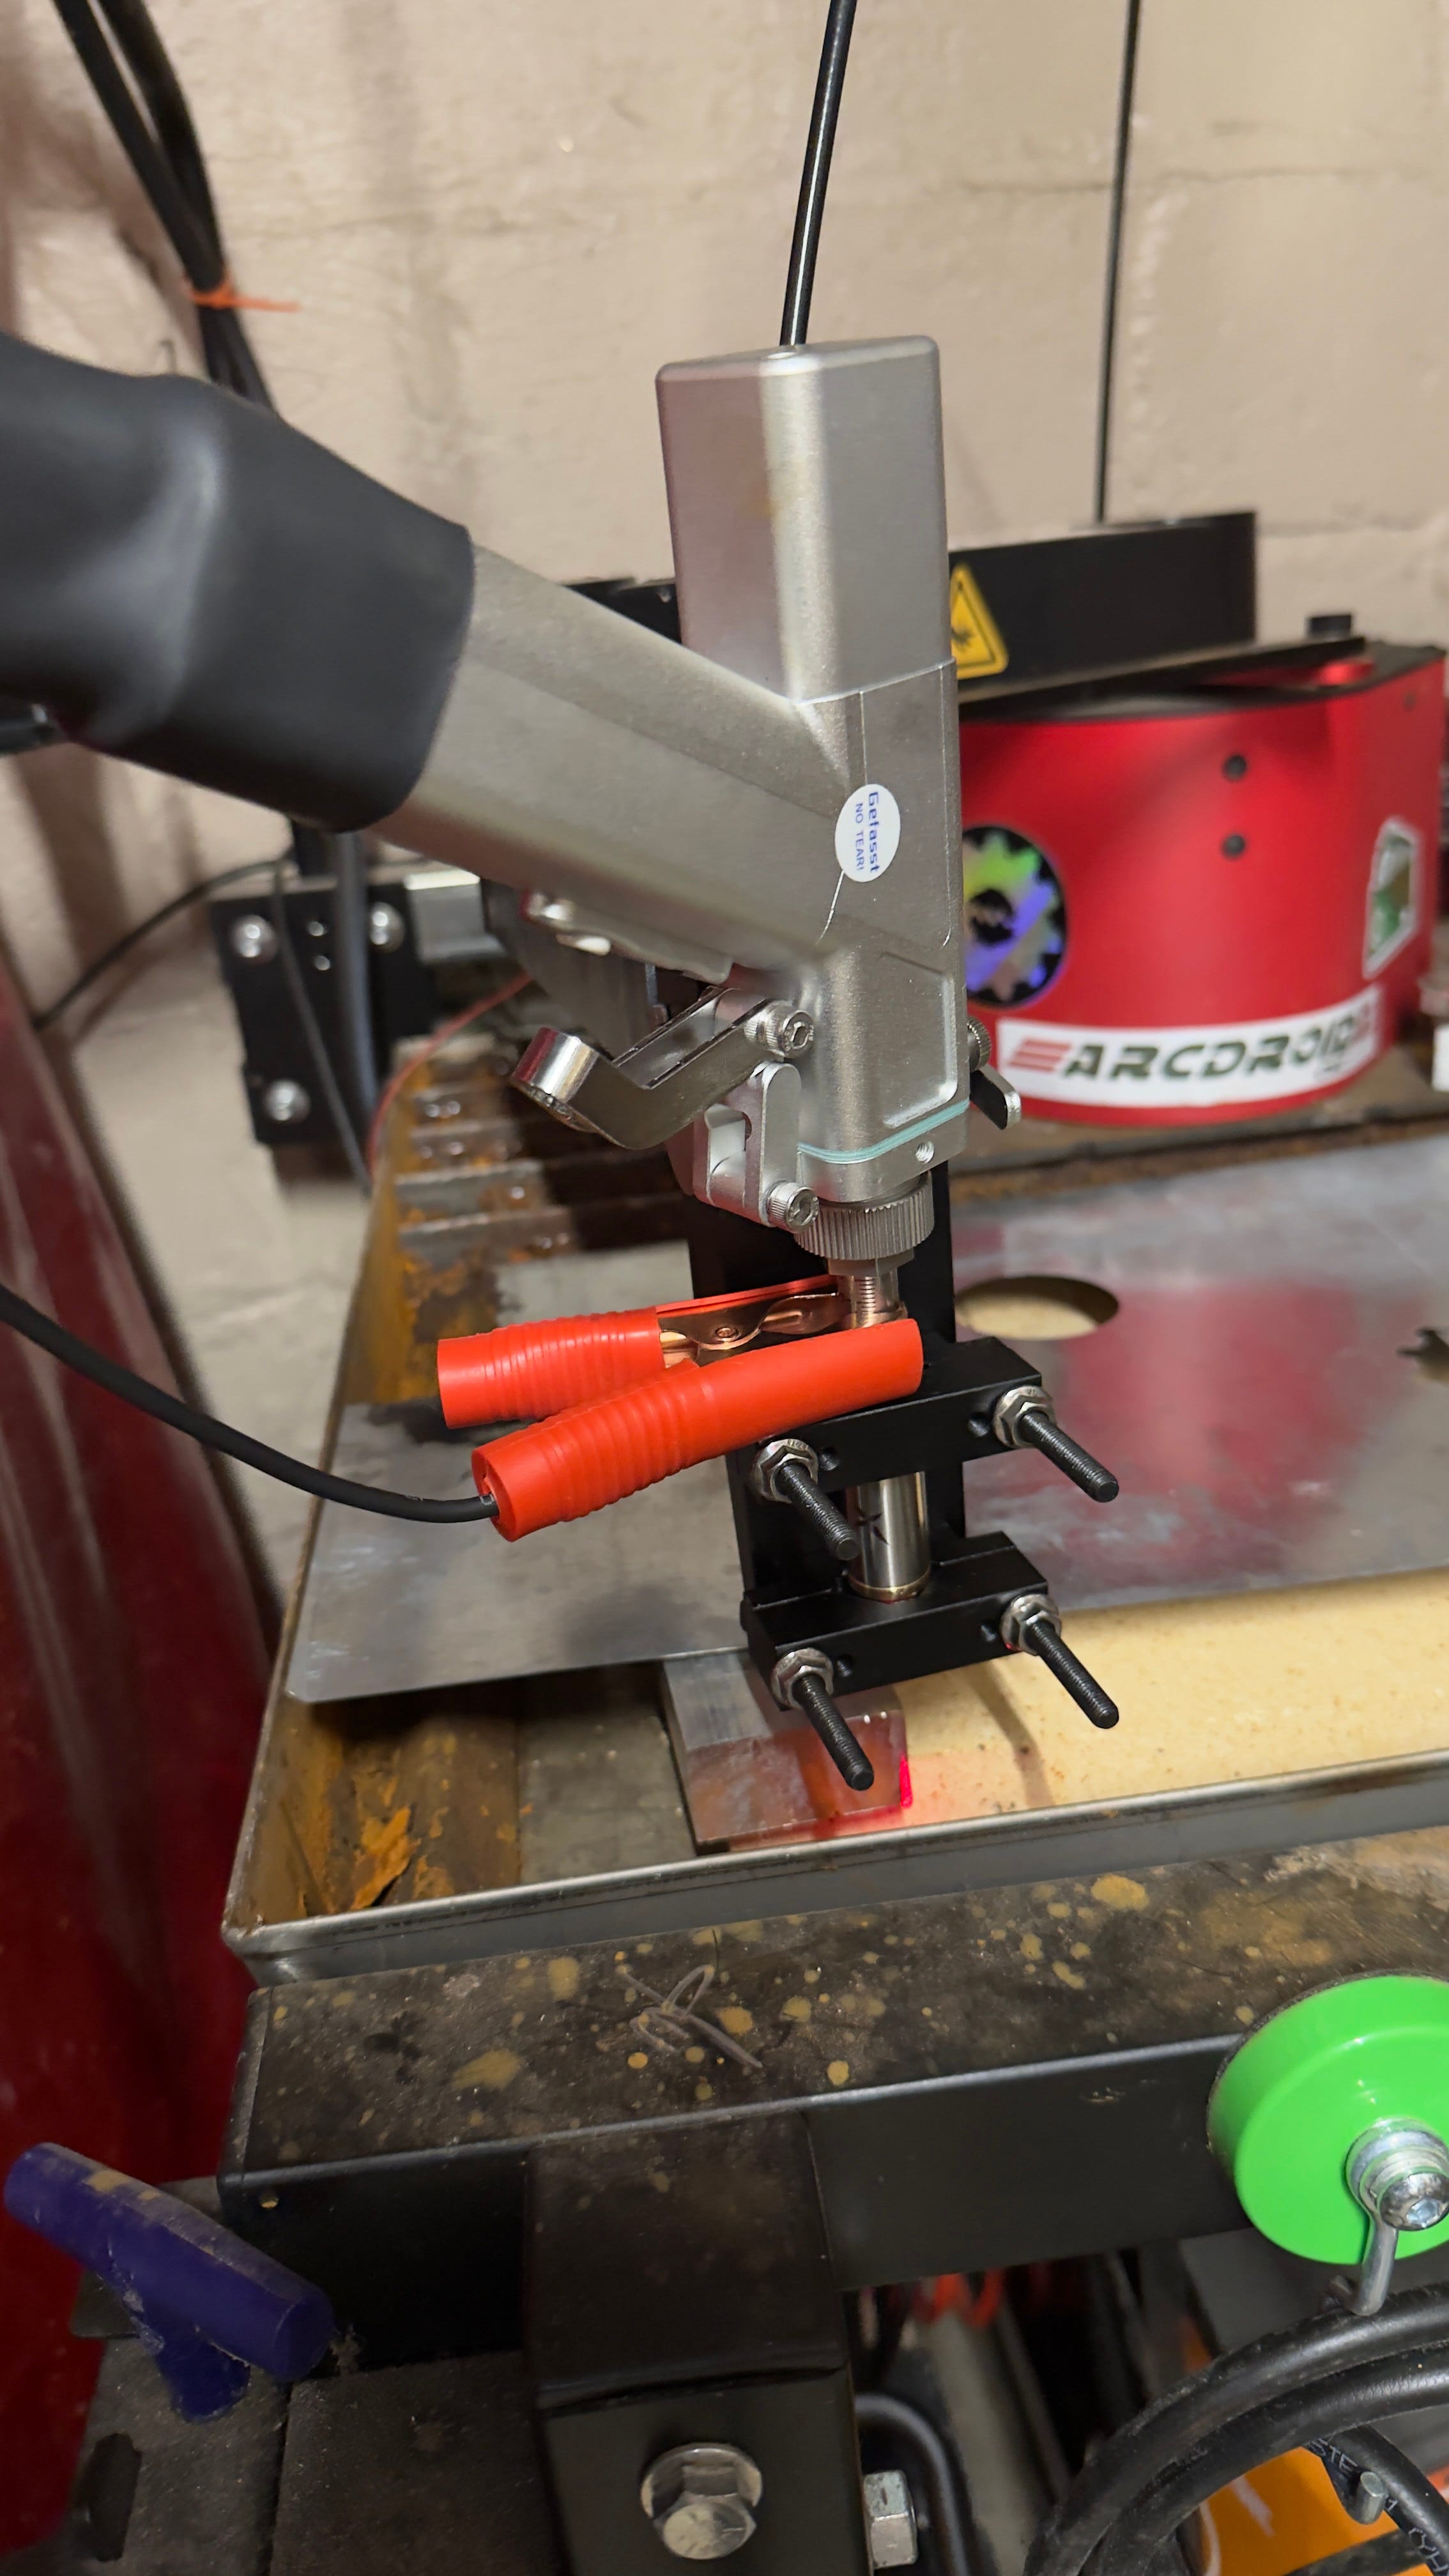
I purchased the ArcDroid Extended Torch Mount (https://arcdroidcnc.com/collections/arcdroid-accessories/products/extended-torch-mount) to mount the laser gun. Ensuring a slight 2-3 degree offset from vertical to prevent the laser beam from reflecting up into the gun. This means perfect round or straight cuts will be a challenge, if not impossible, so this might limit you to more artistic cuts versus strict tolerance parts.
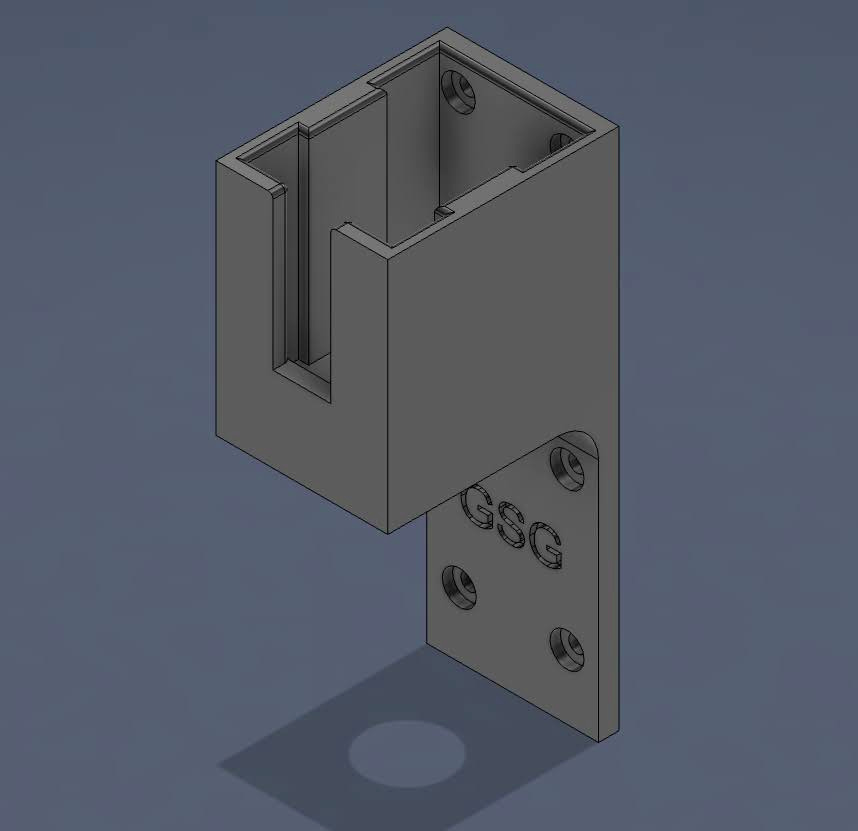
UPDATE: I have designed a mount for the X1 Laser to attach to the ArcDroid. I am selling the STL file for a nominal fee over on Etsy.
Next, let’s talk about kiln shelves.
Lastly, I drained the water table, removed the slats, and cleaned up the rust. I placed shelving typically used in kilns (https://www.amazon.com/dp/B0FG8DTXN8) under the sheet metal I am cutting. This, in theory, will protect the bottom of the water table from getting cut by the laser. This will be useful when I need to convert it back into a water table for materials that require cutting with the plasma cutter. Whether or not this is the best, or even a safe, option is still undergoing testing. I sometimes even place sacrificial aluminum or steel bars on top of the kiln shelf to elevate the sheet metal closer to the torch head.
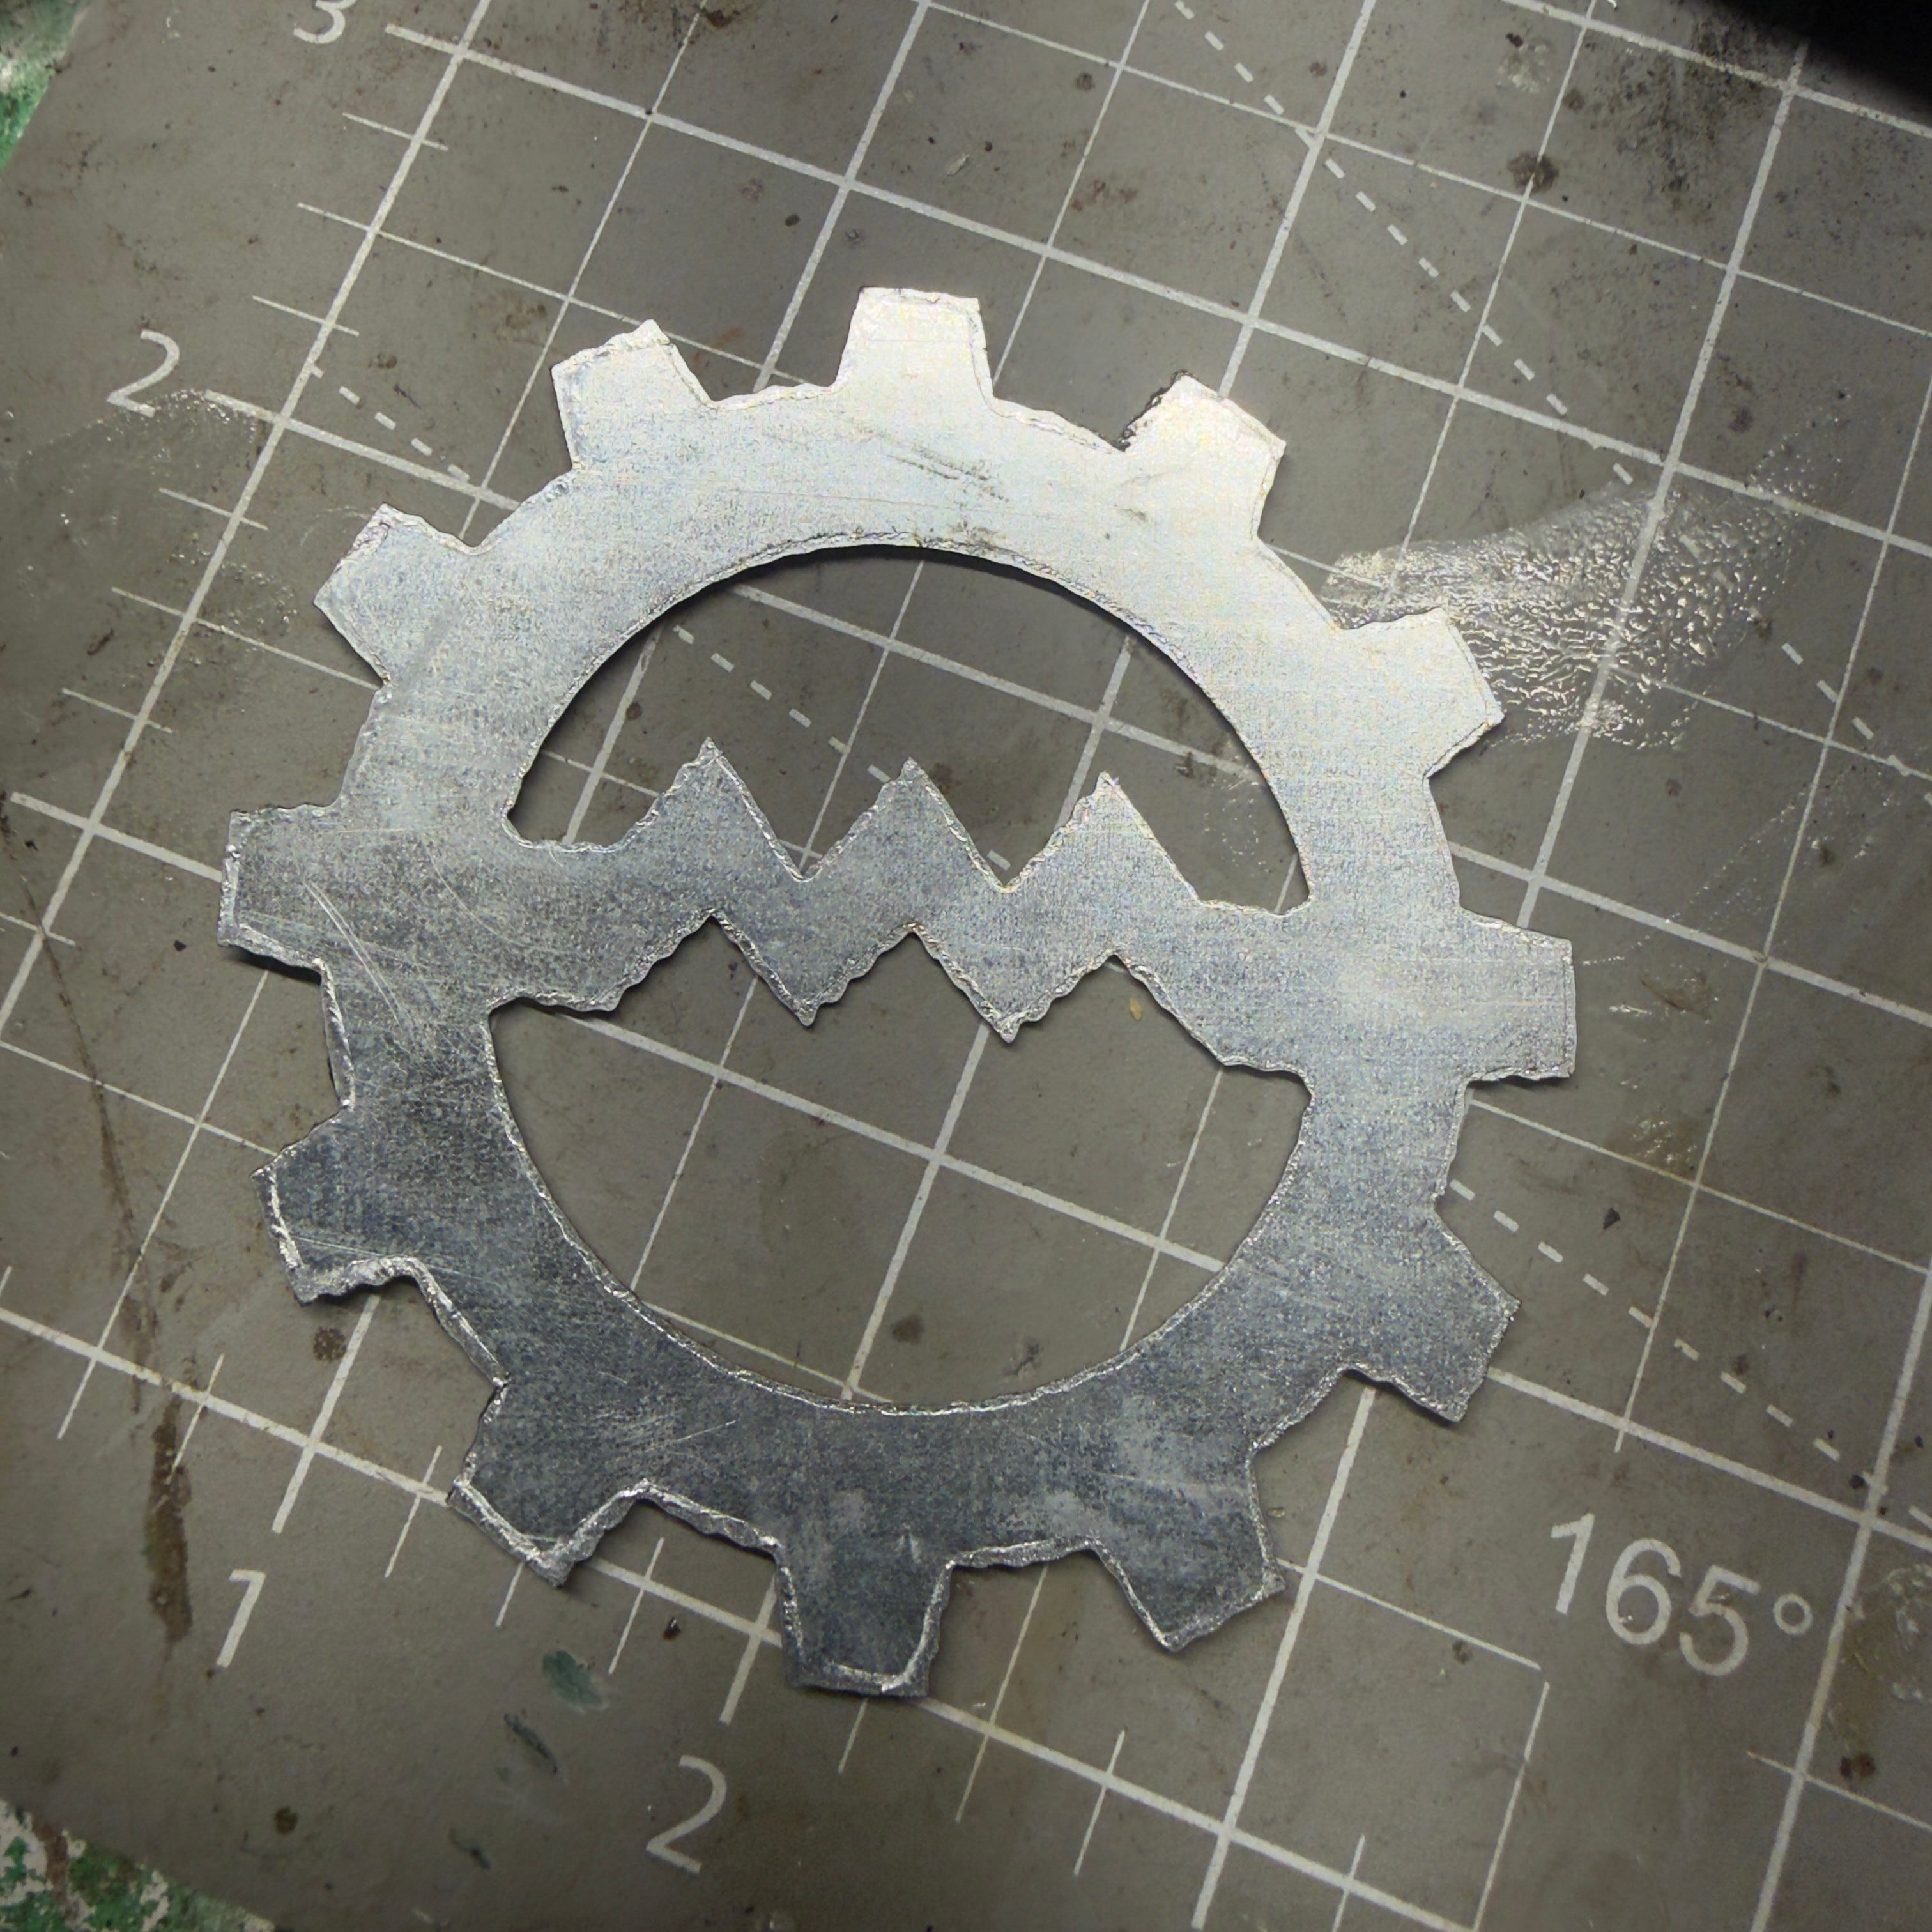
This is the result!
I am also using a California Air Tools 10020C 2.0 HP Ultra Quiet and Oil-Free Air Compressor, 10 Gallon Steel Tank with Wheels (https://www.amazon.com/dp/B0188XBTLY)
The settings for this cut of 1/16” stainless steel are as follows:
55% power
1000 Hz
100% Duty Cycle
90psi compressed air
I loaded up a .DXF file on the ArcDroid and made some settings changes (definitely test different values depending on material and thickness). This is still a lot of room for testing here. But for 1/16” stainless steel, I used these settings:
0” lead-in
Cut on the center of the line
Kerf: .003” or 0.08 mm
Feed: 75 ipm or 32 mm/s
Clear Z: 0.394” or 10 mm
Pierze Z: 0.100” or 2.5 mm
Cut Z: 0.079” or 2 mm
Pierce Delay: 0.5s
Off Delay: 0.25s
P.S.
While exploring 3D printed solutions to the problem of mounting the torch to the ArcDroid, I stumbled across the following things you can print for your ArcDroid: